So, you're going to Disney World! Hooray! I love Disney because it is one of those places that you can go to again and again, but have a different experience every time. No two Disney days are the same. When I was a child I actually only went to Disney World once, back in 1991. I remember loving it, but it wasn't until 2013 that I entered the Magic Kingdom again that I really noticed how much better Disney is than any other theme park out there. (Wow, that is 22 years later. In other news, I feel old).
Well, after the first time we took our daughter there, I was hooked. Disney is incredible, especially if you are seeing it through the eyes of your child.
For our first trip I read, researching and sought advice for months. I came up with a "perfect" game plan for Magic Kingdom park, and it worked! Now I'll share with you everything you need to know to make your trip to the Magic Kingdom as easy as possible.
Tip #1: Stay on Site
Disney's Polynesian Resort
Now, I know Disney Resorts are expensive, but I have stayed both off-site and in Disney Resorts, and there is no comparison in my book. Disney offers so many perks to its Resort guests, not to mention the convenience of staying so close to all that magic!
The first time we took our daughter to Disney we stayed in the Downtown Disney area in a non-Disney hotel. The first hurdle we encountered was just getting to the Magic Kingdom. Let me tell you, driving there is a pain. First you have to get on the Disney property, which is a drive from just about anywhere. What we thought would take 10 or 15 minutes took at least 25. That was just to get to the booth to pay for parking, which was around $15. If you are staying at any Disney resort, your parking is free your entire stay.
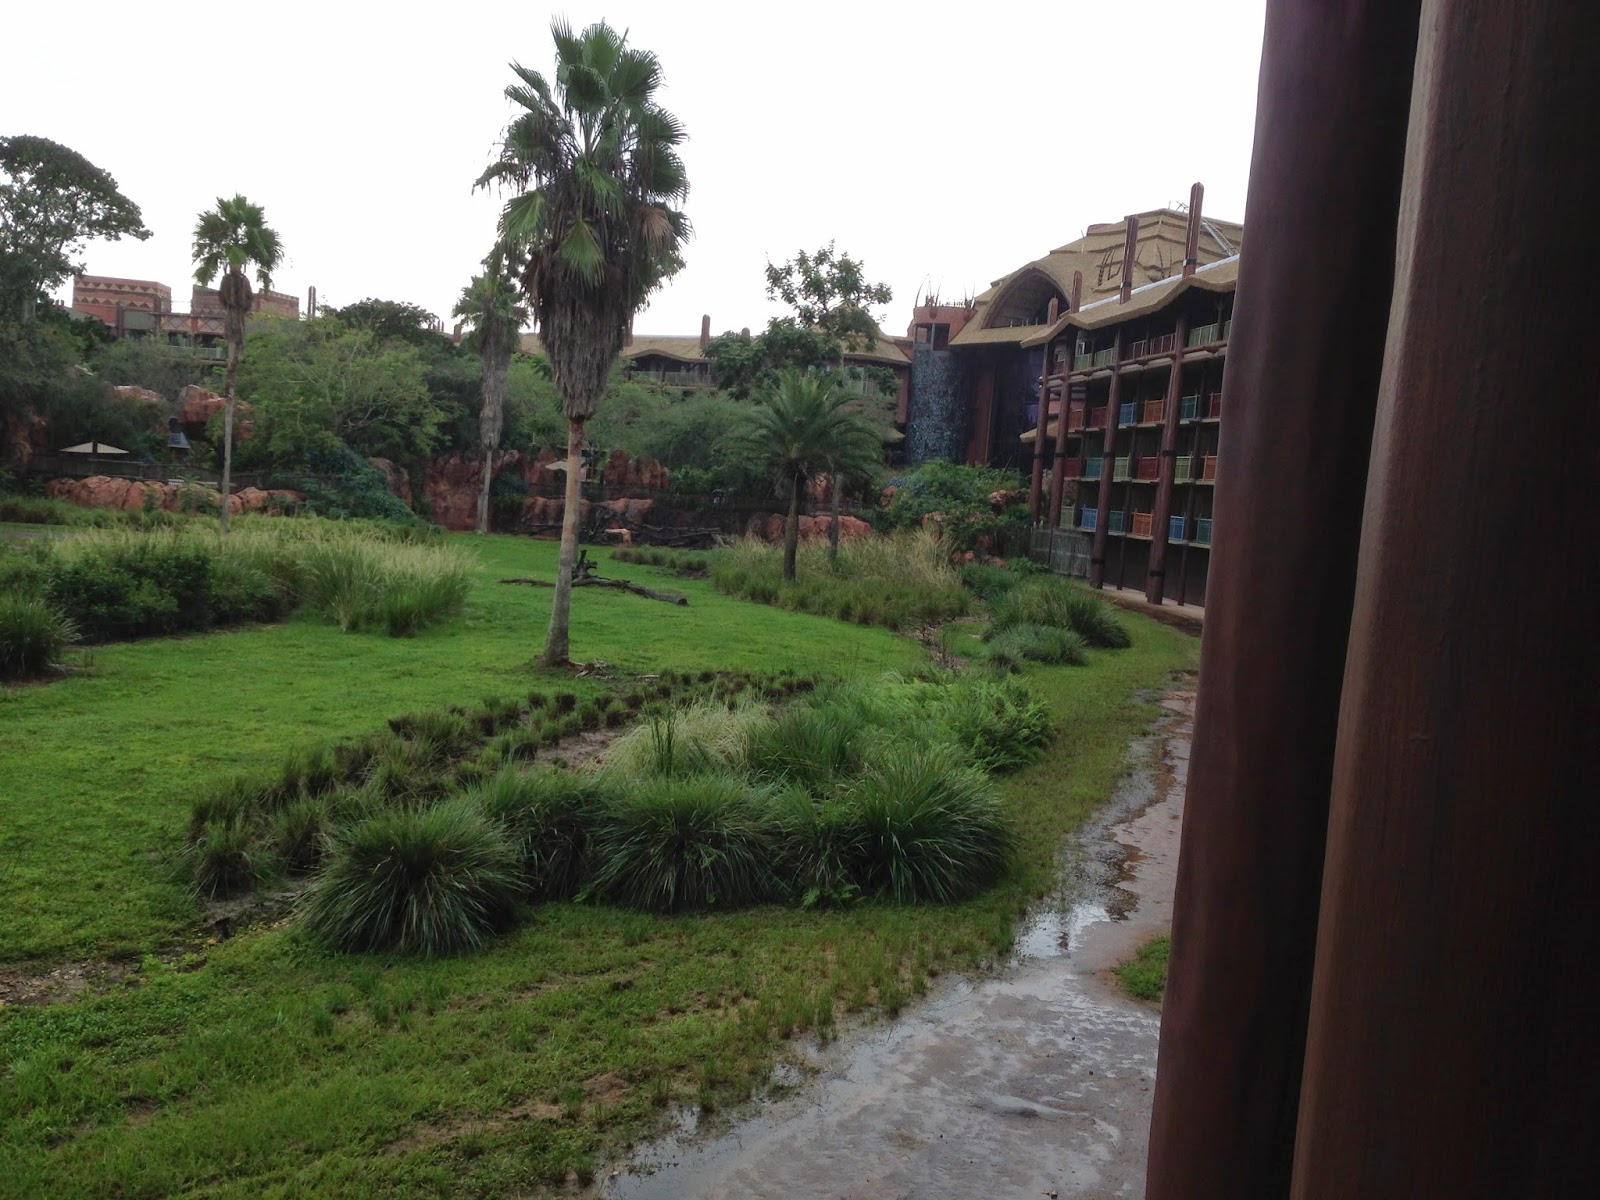
Disney's Grand Floridian Resort and Spa as seen from the Polynesian's water taxi dock
Okay, congratulations, you have made it to the parking lot. But wait, there's more. Now you are parked so far back that you have to take a tram to the front of the lot. Okay, get stroller out, get to tram, fold stroller, cram stroller into tram while holding child, backpack, etc. Then we ride the tram to the front. Unfold stroller. We're here! Wait, no, we're not there. We've just made it to the Transportation Center. Now we have the choice between a ferry boat across the lake or we can take the monorail. Well, we see tons of people in line for the monorail, so we decide to take the ferry. Roll child, who is now screaming because she thought we were there, onto the ferry while in her stroller. Great view, the ferry, but slow. We see the monorail people whizzing past us, but that's okay, we're (finally) landing!
Tip: When you get on the ferry boat, immediately go to the opposite end of the boat from where you entered, and stay on the first floor. Both sides of the boat have ramps that lower, so the end you entered on will not be the exit. If you head straight to the other end of the boat you'll be the first ones off!

If you stay at Disney's Contemporary Resort you can walk to and from the Magic Kingdom in less than 10 minutes. I timed it! Or you could always take the monorail loop, which also stops at the Polynesian Resort, the Grand Floridian and the Ticket Center. I'd say traveling from the Polynesian to the Magic Kingdom by monorail takes less than 10 minutes, but it will vary depending on crowds. Being this close means that on hot (or cold) days you could go back to the resort during the hottest (or wettest) part of the day to swim, take a shower, take a nap, etc. and head back to the park later in the day when it cools off or the weather clears to see the evening entertainment.
You can also take a water taxi to and from the Magic Kingdom if you're staying in one of these three resorts! We did that one night and it was actually a lot of fun. It's not every day you go to dinner via a water taxi.
But if staying at either the Grand Floridian, Polynesian or Contemporary Resorts are not your thing, you can still stay on site at one of
Disney's many resorts! They start at under $100 a night, and your transportation is free! No matter which resort you've chosen, there will be busses that run to the parks continually!
Disney's Caribbean Beach Resort. Mousekeeping left us a Mickey made of towels!
Disney also offers Magic Bands to all resort guests where you can pre-select your three Fastpasses per person per day! If you are not staying on site you will have to make those selections once you get to the park, but resort guests can make Fastpass reservations 60 days in advance! Instead of stopping at the Kiosks, you will be able to focus on having fun. And if you change your mind, just use the My Disney Experience App on your smartphone or use a Kiosk to change in a snap!
Resort guests can also take advantage of the Disney Dining Plan, which I think is fantastic! You can pay in advance for all your meals and just scan your Magic Band, enter your pin number, and leave your wallet at home! The traditional Disney Dining Plan includes one counter service meal, one table service meal and one snack per person (per night of stay). In my calculations, you come out about 10-20% cheaper using the dining plan. If you're planning to eat all or most of you meals on the Disney property (resorts or parks) then this is great.
Resort guests also get Disney's Extra Magic Hours, where one park per weeknight either opens early or stays open late just for guests who are staying at Disney resorts. We have had some fantastic experiences using morning Extra Magic Hours! These Extra Magic Hours are always changing, so look to the Disney website for the schedule.
Also, if you buy something in the parks, you won't have to carry your souvenir with you all through the park. Just ask you cashier for delivery to your resort! It's free, fast and convenient!
Tip #2: Get there Early
Now that I've touched on
how to get to the park, let's talk about
when to get to the park and
where to go once you're there.
First, you need to get to the park when it opens, if not before. By this I mean take advantage of morning Extra Magic Hours if you are staying on site and they are occurring that day. If not, make sure you get to the park when it opens. Some people will camp outside the entrance up to an hour before it opens, but I think arriving just a few minutes before is just fine, too.
You can also make breakfast reservations inside the Magic Kingdom before it opens, too! Look for breakfast openings at the Crystal Palace or Cinderella's Royal Table. Unless it's a special holiday (Thanksgiving, Easter, etc.) the Magic Kingdom will usually open at 9am, but the restaurants that take reservations will start serving at 8am.
Another idea is to make a reservation at the Bibbiddi Bobbiddi Boutique, which opens at 8am to pamper your little princess between the ages of 3 and 12! If you do make it into the park before it opens, it's a fantastic opportunity to take a picture in front of the castle before the mob comes walking down Main Street! More to come on the Bibbiddi Bobbiddi Boutique later in this post.
Note: Though the Magic Kingdom typically opens at 9am, on days where there are morning Extra Magic Hours, the park will be open to all Disney Resort guests at 8am. Visit the Disney website for specific schedules.
Tip #3: Bring Your Own Stroller/Baby Carrier and
Make It Easy to Find

Once you make it into the park, there will most definitely be a line for stroller rentals. Renting one of these strollers will not only slow you down by having to wait in line to rent one, but they are also ridiculously uncomfortable. The Disney strollers are hard, molded plastic that do not recline. Trust me, you will need strollers that recline.
In addition, think of the literally hundreds of people who are renting the same exact stroller that you are. Disney gives you a small card to write your name on and hang from the handles, but you will be spending a lot of time chasing your stroller if that is the only way to tell them apart.
In fact, even though we bring our own stroller, we label it for quick identification! I usually print out a sheet of paper with our last name in large letters (see below). This slides in a page protector, which is zip-tied to the handle of the stroller. It makes it a little more difficult to get the stroller mixed up! I also keep our dining reservations, confirmation numbers, maps, etc. in the page protector where I can easily reach it!

"But wait," you say, "I'll just park my rented stroller in a specific spot and I'll remember where it is." Oh, how I wish this were true, but it's not! Disney has designated areas for stroller parking all throughout the park. You park your stroller there and you run into whatever attraction is next on your list. While you are in line for Peter Pan's Flight or Splash Mountain or whatever your stroller will be moved. Trust me on this. Disney has employees whose entire job is to organize strollers. That means that they are constantly moving strollers to make them as tidy-looking as possible. Let me tell you, there is no way to quickly find your rented stroller under these circumstances. It is so great for making sure that you can get your stroller out, but it can be such a challenge to find it!
Also, remember that at Disney you cover a lot of ground, and not just in the parks! Just walking around your resort is a lot of walking. I know kids are small, but all of us parents have been there when your arm is just killing you from holding a baby for an hour and a half straight. Walking so much creates a great deal of fatigue for us adults, so adding a 25 or 30 pound toddler gets tough quickly.

The stroller is also a great place to rest. Even for kids who don't normally take a nap anymore, the stroller has turned into an impromptu naptime area. During our first trip to Disney, we were a little surprised that our daughter fell asleep in the stroller. She hadn't taken a nap for about 6 months, but with all that walking, getting up early, excitement, etc. she was beat! Having the stroller was great because we weren't limited to staying in one spot while she caught some Z's. We actually walked to Main Street and got a spot for the afternoon parade while she slept. By the time she woke up it was time for the parade to begin!
Once our second child was born I ended up buying an inexpensive second-hand double stroller of Craigslist. It was a great buy for our family! Even with that great stroller, I spent a lot of time baby wearing her in our awesome Ergo carrier. Since I do that a lot at home, it was easy for her to nap and even ride rides while in the Ergo!
Note: Even when bringing your own stroller, it's helpful to put something on your stroller to easily identifiable. If the page protector with name idea is not for you, one of my friends came up with the idea of putting a Rapunzel "braid" made of yarn on the handle of her stroller. She said that it made it so much easier to find her very popular stroller in the "sea of red strollers." (see below)
Tip #4: Schedule Character Dining
With two young children in our house, we LOVE character dining. Disney is great about putting characters out in the park, but they will often draw long lines very quickly. We schedule character dining so we can kill two bids with one stone. We get a meal indoors and all of these characters come around to see us instead of our family walking all of the Magic Kingdom to track them down! I really cannot speak highly enough of the character dining at Disney. I highly recommend it.
Many of these dining experiences will book up quickly, or if you wait there will only be odd times available. (When you have kids, there is
no way I'm going to make a dinner reservation for 9pm.) Anyone can make
dining reservations online beginning at midnight 180 days before the day selected or 7 am by phone (407-939-5277).

Here is the trick to booking a great dining reservation. First, do your homework on which meals you would like to try. You can read my previous blog post on my favorites
here. Once you have decided, you need to try to make your reservations as close to the 180 day mark as possible if you are not staying at a Disney Resort.
If you are staying at a Disney Resort, reservations can be made 180 days from the first day of your stay in a Disney resort. That means you can make reservations ahead even further than the general public if they are not staying on site. So, if the first day of your stay is 180 days away you can book dining reservations for anytime the following 10 days thereafter. If you plan to arrive on a Monday and that day is 180 days away, you can make reservations for Friday, which is 184 days away or even the following Thursday, which is 190 days away. They will not let you make a reservation greater than 10 days from your first night's stay.
Tip #5: Make a Plan of Attack
When we get to the Magic Kingdom we follow my previous tips of getting there when the park opens or getting inside early due to a reservation. But once the park officially opens and the rides are running, we go immediately to the back of the park into Fantasyland. Most people will walk down Main Street and stop at the closest thing to them on the left and work clockwise around the park. We walk straight through the castle and go to the attractions that will have the longest wait times in Fantasyland. This is usually the order we use:
Meet Ariel at her Grotto (usually no line at this point)
Ride Under the Sea, the Journey of the Little Mermaid (no line)
Ride Peter Pan's Flight (we've waited maybe 10 minutes this early)
Ride Small World (usually no line)
Meet the Princess in Princess Fairytale Hall (small line, but usually not more than 10 minutes)
Ride the Many Adventures of Winnie the Pooh (may get a 15 minute line)
Ride the Teacups (usually less than 5 minute wait)
Ride Dumbo (usually no line)
Ride the Barnstormer (usually 10 minute wait or less)
With the exception of Mickey's Philharmagic, which we skip because we don't like it, that is just about all of Fantasyland done before lunch! The crowd will hit Fantasyland around lunch time, but you will already be done with these rides by then!
I also usually go on the Disney Parks website in advance to make a spreadsheet with times and locations of all the character meetings, special events (like parades), and our FastPass+ times.
Here is an example of an old one:
I color code events by section of the park. I slip this schedule into the page protector that is hanging from the handle of our stroller so it is always close by for easy reference.
Tip #6: Schedule your FastPass+ Selections Wisely
What is FastPass+ ? It's a fantastic and free program open to anyone who buys a ticket to a Disney theme park. FastPass+ allows you to schedule a time to ride an attraction (up to three attractions per day).
Rather than standing in the standby line, you will go to the FastPass line. You will scan your Magic Band (resort guests) or card (non-resort guests) at the entrance and just sail on through! You will have an hour window to make it to your FastPass reservation, so when you reserve your time it will say you have a FastPass for Splash Mountain between 2:15 and 3:15. You can show up at any point in that window and gain entrance, but they are turning people away if they are early or late.
With the new Fastpass Plus system, resort guests can make their Fastpass Plus selections in advance. Before you even leave your house you have a time to ride up to three rides per day. If you are not staying at a Disney resort, you will have to go to a FastPass+ station in the park to select your times.
Note: Disney's old system allowed for unlimited FastPasses in the day, but the new system allows you to select only three per day. There has been recent news that Disney is working to now allow unlimited FastPasses per day again, but there is no indication of when that will happen. You can read more about that here.
Since everyone is allowed only three FastPasses per day, we decided to follow my plan of heading back to Fantasyland to ride all of those rides early in the mornings when crowds and lines are at their lowest. I always schedule my FastPass+ selections for the afternoon, when crowds tend to pick up. There are some rides that never really have a bad line, and those are the ones we save for the afternoon/evening when the heat and crowds are at their peak.
Here are the rides that I think you need to make a FastPass+ reservation for:
Peter Pan's Flight
Under the Sea-Journey of the Little Mermaid
The Many Adventures of Winnie the Pooh
Meet Ariel at her Grotto
Big Thunder Mountain Railroad
Jungle Cruise
Splash Mountain
Space Mountain
Meet the Princesses at Princess Fairytale Hall (get a Fastpass for Rapunzel, but not the other side)
Enchanted Tales with Belle
As you can see, there are more rides that need FastPasses than you are allotted in a day, so we prioritize. We get FastPasses for Big Thunder Mountain Railroad, Space Mountain, and Peter Pan's Flight. All the rest we just try to hit before the mob gets to the park! You will stand in line at some point in the day, but Disney does a great job of designing the ride queues to be interactive and fun. The Winnie the Pooh ride is my favorite queue. There are so many things for the kids to play with and see in this line. My daughter actually cried when there was no line one day and we walked right onto the ride because she wanted to stop and play with all the fun things they put out!
There are some rides that either have very fast-moving lines or never get bad lines during the day.
These are the ones we ride when the crowds are at their worst:
Prince Charming's Regal Carousel
Small World
Dumbo the Flying Elephant
Swiss Family Robinson Treehouse
Enchanted Tiki Room
Carousel of Progress
Mickey's PhilharMagic
Pirates of the Caribbean
Magic Carpets of Aladdin
Note: Just about every ride and character meet and greet will have a sign outside it displaying the current wait time. You can also find this information by using the free "My Disney Experience" App for your Smart Phone. FastPass+ selections may also be changed by using this App in the park!
Tip #7: Schedule Your Princess' Makeover at the Bibbiddi Bobbiddi Boutique
Okay, so this one is just for fun, but it really is a lot of fun! Any little Princesses between the age of 3 and 12 can make a reservation for a makeover at the Bibbiddi Bobbiddi Boutique, which is inside Cinderella's Castle! There are many different packages available, from about a $55 basic package (hairdo, tiara, makeup, face gem, tote and sash) all the way up to a $195 package (Princess dress, shoes, nail polish, hairdo, tiara, picture package, face gem, tote and sash).
This is one memory my daughter just keeps talking about. She loved being able to pick her own hairstyle and get made over by her own "Fairy Godmother in Training." I will say that even with the basic package, it still took about 30 minutes total to finish, so try to get a reservation before the park opens if you can! Also try to make your reservations as close to the 180 day mark as possible because these spots book up quickly!
My daughter loved this experience! It was completely worth the $50 to me! Bring your own princess dress you bought outside the park or that your daughter wears at home to save serious dinero! You can also tip your Fairy Godmother in Training, and they deserve it! Ours was terrific!
Tip #8: Utilize the Photopass Photographers
One thing Disney is great at is providing these amazing photographers in the parks at key spots. These fantastic people are called Photopass Photographers. You will notice them from the moment you enter the park. They line up on Main Street and as you walk into the park they can snap your party's photo in front of Cinderella's Castle, the trolley, with characters, etc. Usually one person in the group who is designated as the "photographer" is the one who is left out of family photos. With Disney that is a thing of the past!
When you get a Photopass Photographer to take your picture all you have to do is get them to scan your Magic Band and it will automatically show up on your My Disney Experience account online! You can buy each individual picture for about $15 each or you can purchase the Disney Memory maker to receive all your photos.
If you have pre-purchased the Disney Memory Maker, you will get all of your Photopass photos for $149 if you buy it two weeks or more before the first day of your trip. If you buy it later, it's $199. It includes every single picture Disney takes while you are on site. The photos at your character meals, action snapshots on rides (Splash Mountain, Expedition Everest), as well as all your posed photos in the parks are included! To download pictures from dining experiences, you will need the code they give you at the restaurant and you will enter that code on your Memory Maker account. If you don't know where to find it, just ask! Your Memory Maker includes downloads of
all your pictures and the release to print them!
I think the Memory Maker is a great buy, but here is a tip: If you give the Photopass Photographer your camera, he or she will take a picture with it. Yes, your own camera! Even at the big posed phots, like at Cinderella's Royal Table. The Bible says, "Have not because you ask not."
Tip #9: Get your baby in every photo
Your baby who is not walking yet can definitely get in a picture with the characters as long as he or she is comfortable sitting with them. Disney policy is that no Cast Member can hold your baby, so do not ask! However, most of the characters will automatically sit down with your child and sit your baby on their lap for a photo (see above). I have never asked a "fur" character (Mickey, Tigger, etc.) to take a photo with my baby, just the "face" characters (Alice, Mary Poppins, etc.).
If your baby is nervous around a giant, human-sized duck with eyelashes reminiscent of Tammy Faye Bakker (side note: smart baby), then just hop in the picture, Mom or Dad! I've noticed my baby does a lot better with the "fur" characters as long as she can be on my hip. Baby might occasionally look at your eyes to see that everything is alright, and that's a good thing! It's great to teach them early that there should be no fear here. Just remember to introduce the baby slowly, which I've found is the one perk of waiting in a line to see a character. Baby can see them from a distance, and get used to the idea of the character. The only times we have seen her cry around characters was when Winnie the Pooh surprised her once. It also helps if you have a big brother or sister around; my baby wants to do anything big sis does, and she will take a picture with any character so long as big sis is with her!
Tip #10: Utilize the Disney Dining Plan
I have used the Disney Dining Plan twice and I love it! It's a very simple program Disney offers for purchase for all its resort guests. With the traditional Dining Plan you get one table service meal, one quick service meal and one snack per guest (3 and older) per night of your stay. Instead of getting out your wallet every time you want a bag of popcorn or some chicken tenders or even a character meal dining experience all you have to do is use your Magic Band! You will scan your Magic Band at the cash register at quick service restaurants and snack kiosks or your server will scan them with a hand-held device at table service meals. You just enter your pin and you're on your way! The gratuity can even be charged to your credit card on file. No need to break out the old wallet!

Every Disney Resort will have at least one quick-service restaurant and that makes it even easier to grab fast meals from anywhere at Disney. Yes, anywhere! You can use the dining plan in the parks or at any resort. If you're staying at the Polynesian, you can eat a quick service credit at Pinnochio Village Haus for lunch and a table service credit at 1900 Park Fare at the Grand Floridian Resort character meal for a table service credit dinner!
When you check into your Disney Resort your account will automatically be credited with all your dining in one lump sum. They will not expire until the day after you check out. From there you can use them at your leisure wherever and whenever you like! Just remember that while most restaurants only require one credit per person, some require two, like Cinderella's Royal Table, Hoop-De-Doo Musical Review, and The Spirit of Aloha Dinner.

When I tally it up, I estimated that we saved between 10-20% total on food on our last trip. I thought that was fantastic, especially when you consider that it is just so convenient too! One other perk of the dining plan is that if you are on the regular Disney Dining plan, you will also get free Rapid Refill Mugs, which you can use at the soda refill station at your resort. These mugs allow you to get unlimited soft drink refills for the duration of your stay! If you have a soda addict in your family, the $16 for the entire trip will probably be worth it. The only down side to this is that you can only refill for free at your resort's soda refill station; you cannot use it in the parks. Well, here is what we did. When using the dining plan quick service credits you get one entree, one side, one drink and one dessert per meal. Usually the drinks are bottled, so we when we would eat quick service at our resort we would grab an applejuice, Coke, Lemonade, whatever AND fill up our Rapid Refill mug. We would drink the soda in the mug and just put the bottled drink in the mini fridge in our room. We just kept these and used them in the cooler for the ride home, took it to the park or drank it early in the morning when we woke up and didn't feel like leaving the room yet! You also can keep the snazzy mug as a souvenir!
Note: On the Dining Plan, a snack credit is considered something small in the park like an ice cream bar, a bag of popcorn, apple slices or one bottled beverage. If you bring your own bottled water into the park you can use your snack credits for the unique food Disney offers!
One of my favorite ways to use the Dining Plan is to reserve a character meal and use one of the Table Service credits for it. I think you really get a bang for your buck with character dining! You can read more on my favorite Character Meals
here.
Note: While I only spoke of the traditional Disney Dining Plan above, there are several variations of the dining plan available. From only quick service meals to Platinum Dining Plan, which includes three table service options per person per day. Call Disney Dining for additional information.
Tip #11: Go in the Off Season
Typically, the highest crowds at Disney World occur over Spring Break, all of Summer, and Christmas break until New Year's. My family will typically go in the off-season, which is basically anytime school is in session. In addition to lower crowds, you'll also find that the resort room rates are cheaper and you'll sometimes get a perk, like free dining or free unlimited soft drinks with your reservation.
This website is great at spelling out the big pros and cons of a Disney vacation each month of the year.
We have been in January when it's perfect shorts and tank top weather one day and the next day we are wearing hats, boots and gloves. You just never know with January. But the crowds are pretty consistently low and that also makes dining reservations easier. While I think going in the off-season is great, just know that ride closures and refurbishments generally occur during this time.
Conversely, we have also been on Thanksgiving day, and while many people will tell you to avoid the Magic Kingdom on all holidays, I can tell you that we had an absolutely phenomenal time that day. Now, we went at the last minute, so there were no dining reservations to be had anywhere in the Magic Kingdom, but we decided we would just eat counter service meals and stick to our normal plan of getting there early, riding the big rides first, etc. Well, it turned out to be my favorite day at Disney World to date.

We stayed at a Disney Resort, so we got Extra Magic Hours that morning. We got to enter the park at 7am. Being the first ones there, we also got a fantastic parking spot, and didn't even need to take the tram. We ate a very early lunch (10:30am I think) at Be Our Guest Restaurant, which is counter service only for lunch. It was incredible and such a fantastic memory. The popularity of this restaurant is off the charts, so it worked out great that we were hungry so early in the day (from getting up so early that morning) and that meant we beat the line to eat there.
All that said, just maneuvering around the magic kingdom at a peak time of year is a feat. The off-season is significantly easier to find good room rates, dining options, and shorter wait times.
While I say to go in the off season, no matter when you go, anytime is a good time to go to Disney!